はじめに
Teigha Publish を使用して作成するドキュメントで、3D CAD モデルのビューを切り替える機能を簡単に実装できます。
この記事では、JavaScript を使用して OdAnnotation オブジェクトのビューを切り替える方法について説明します。OdAnnotation クラスには2つの関数があります。
void setCarouselButtons(const OdStringArray& button_names, const OdString& previous_button_name, const OdString& next_button_name, OdUInt16 scroll_size);

void setCarouselViews(const OdUInt32Array& indices, const OdImagePtrArray& images);
これらの関数は、OdAnnotation オブジェクト領域の下部を占めるビュー切り替えボタンのグループを作成するために使用されます。この記事では、作成されたドキュメントの任意の場所にカスタムビュー切り替えボタンを追加します。
基本
OdDocumentクラスのインスタンスを作成し、OdAnnotationオブジェクトが配置されているページを追加し、.prcファイルをOdCADModelオブジェクトにロードして、OdAnnotationに追加します。
OdFilePtr pPublisher = OdFile::createObject();
TEST_ASSERT(!pPublisher.isNull());

OdDocumentPtr pDoc = OdDocument::createObject();
pDoc->setInformation(L"Test Document", L"Author", L"Test", L"Oda Pdf Publish");
pDoc->setHostServices(pHostApp);

OdPagePtr pPage = OdPage::createObject();
pPage->setOrientation(Page::kPortrait);
pDoc->addPage(pPage);


OdString sFile = L"CORE11713\\tank.prc";
OdString sIn = pHostApp->findFile(sFile);

OdRect rect;
rect.m_min.x = 1;
rect.m_max.x = 593;

OdGePoint3d maxP = OdGePoint3d(2.0257825851440430, 1.1199963092803955, 5.8764815330505389);
OdGePoint3d minP = OdGePoint3d(-1.0000000000000002, -1.103692531585693, -2.2000000476837140);
OdGeExtents3d extPrc(minP, maxP);

OdCADModelPtr pModel = OdCADModel::createObject();
pModel->setSource(sIn);
OdAnnotationPtr pAnnot = OdAnnotation::createObject();
pAnnot->setSource(pModel);
pAnnot->setTransparentBackground(false);
pAnnot->setName(OdString().format(L"Test 3D Annotation%i", i));
pAnnot->setModelTreeVisibility(true);

pPage->addAnnotation(pAnnot, rect);
次に、切り替えを実行するために使用されるビュー名の配列を作成します。
OdStringArray view_names;
view_names.push_back(L"Default");
view_names.push_back(L"Front");
view_names.push_back(L"Back");
view_names.push_back(L"Right");
view_names.push_back(L"Left");
view_names.push_back(L"Top");
view_names.push_back(L"Bottom");
次に、OdArtworkクラスのインスタンスを作成し、addViewユーティリティ関数(PublishTemplate*の例を参照)を使用してOdViewオブジェクトを追加します。
OdArtworkPtr pArtwork = OdArtwork::createObject();

double field_w = 100;
double field_h = 100;

//Front
addView(pArtwork, OdGePoint3d(0, -1, 0), OdGePoint3d::kOrigin, OdGeVector3d::kZAxis, view_names[1], view_names[1], Camera::kOrthographic, field_w, field_h, extPrc);
//Back
addView(pArtwork, OdGePoint3d(0, 1, 0), OdGePoint3d::kOrigin, OdGeVector3d::kZAxis, view_names[2], view_names[2], Camera::kOrthographic, field_w, field_h, extPrc);
//Right
addView(pArtwork, OdGePoint3d(1, 0, 0), OdGePoint3d::kOrigin, OdGeVector3d::kZAxis, view_names[3], view_names[3], Camera::kOrthographic, field_w, field_h, extPrc);
//Left
addView(pArtwork, OdGePoint3d(-1, 0, 0), OdGePoint3d::kOrigin, OdGeVector3d::kZAxis, view_names[4], view_names[4], Camera::kOrthographic, field_w, field_h, extPrc);
//Top
addView(pArtwork, OdGePoint3d(0, 0, 1), OdGePoint3d::kOrigin, OdGeVector3d::kYAxis, view_names[5], view_names[5], Camera::kOrthographic, field_w, field_h, extPrc);
//Bottom
addView(pArtwork, OdGePoint3d(0, 0, -1), OdGePoint3d::kOrigin, -OdGeVector3d::kYAxis, view_names[6], view_names[6], Camera::kOrthographic, field_w, field_h, extPrc);
//Default View
OdGePoint3d defCamPos(-0.90612681748501411, -0.37532908821626582, 0.19509553088993711);
OdGeVector3d defUpVec(0.18024483319542611, 0.074659669699104828, 0.98078424427943056);
addView(pArtwork, defCamPos, OdGePoint3d::kOrigin, defUpVec, view_names[0], view_names[0], Camera::kOrthographic, field_w, field_h, extPrc, Rendering::kDefault, Lighting::kDay, true);

pAnnot->setArtwork(pArtwork);
名前でビューを切り替える例
以下のコードは、ビュー名を使用してビュー切り替えボタンを作成する方法を示しています。
static const OdChar* changeViewFuncJS =
L"function ChangeViewByName(pageIndex, annot_index, view_name) \n"
L"{                                                            \n"
L"  annot = this.getAnnots3D( pageIndex )[ annot_index ];      \n"
L"  if(annot != null)                                          \n"
L"  {                                                          \n"
L"    annot.context3D.runtime.setView(view_name);              \n"
L"  }                                                          \n"
L"}                                                            \n"
L"                                                             \n";

pDoc->addJavaScript(L"changeViewFuncJS", changeViewFuncJS);

OdRect button_rect(10, 60, 5, 55);
for (OdUInt16 i = 0; i < view_names.size(); ++i)
{
  OdButtonPtr pButton = OdButton::createObject();
  pButton->setName(view_names[i]);
  pButton->setLabel(view_names[i]);
  pPage->addButton(pButton, button_rect);
  button_rect.m_min.x += 70;
  button_rect.m_max.x = button_rect.m_min.x + 50;
  pPage->addJavaScriptActionByField(view_names[i], L"ChangeViewByName( this.pageNum, 0, \"" + view_names[i] + L"\");", Action::kButtonReleased);
}
このコードでは、OdAnnotationの定義済みビューの数に応じてOdButtonオブジェクトが作成されます。定義済みビューを選択するための共通コード部分は、ドキュメントレベルの個別のChangeViewByName関数で作成されます。JavaScriptでは、ボタンのスクリプトには、ページ番号、ページ上の注釈インデックス、定義済みビューの名前を引数としてこの関数を呼び出すコードのみが含まれています。結果を以下に示します。
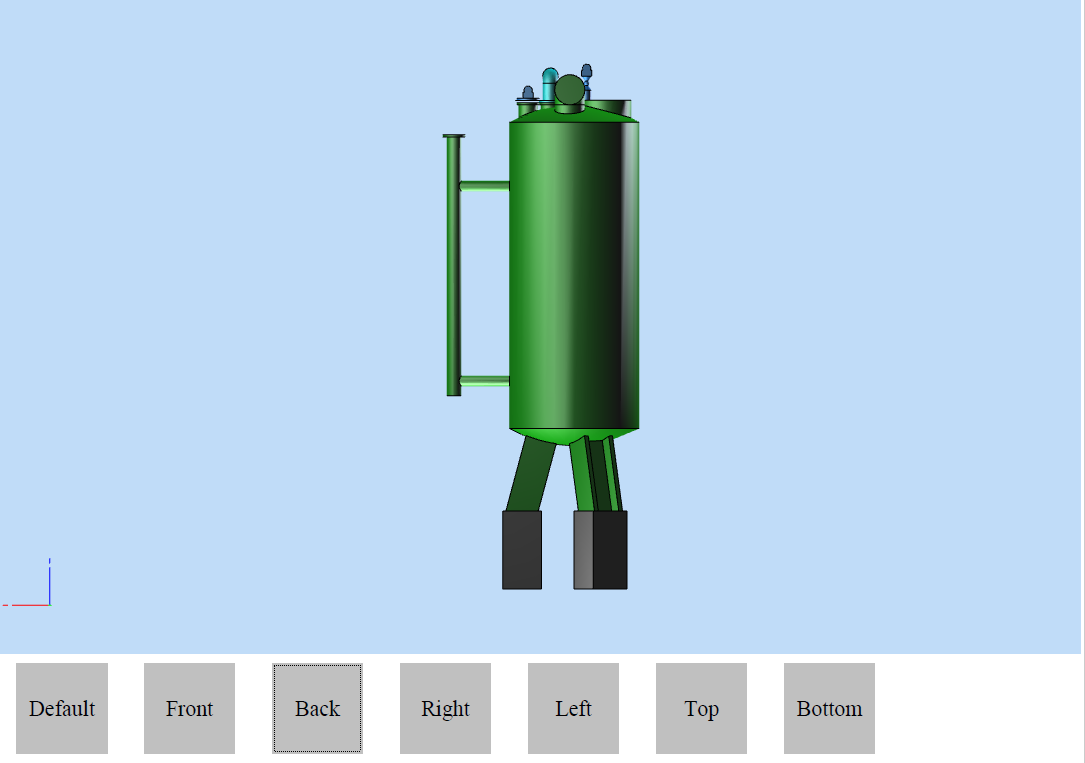
切り替えを制御するには、OdButtonボタンだけでなく、JavaScriptスクリプトに割り当てる任意の他のコントロールを使用できます。
インデックスでビューを切り替える例
以下のコードは、ビューインデックスを使用してビュー切り替えボタンを作成する方法を示しています。
static const OdChar* scrollViewFuncJS =
L"var current_view_index;                                 \n"
L"if(!current_view_index)                                 \n"
L"    current_view_index = 0;                             \n"
L"function ScrollToView(pageIndex, annot_index, next)     \n"
L"{                                                       \n"
L"  annot = this.getAnnots3D( pageIndex )[ annot_index ]; \n"
L"  if(annot != null)                                     \n"
L"  {                                                     \n"
L"    if(next)                                            \n"
L"    {                                                   \n"
L"      viewCount =  annot.context3D.runtime.viewCount;   \n"
L"      this.current_view_index += 1;                     \n"
L"      if(this.current_view_index >  (viewCount - 1))    \n"
L"        this.current_view_index = viewCount - 1;        \n"
L"    }                                                   \n"
L"    else                                                \n"
L"    {                                                   \n"
L"      current_view_index = current_view_index - 1;      \n"
L"      if(current_view_index < 0)                        \n"
L"        current_view_index = 0;                         \n"
L"    }                                                   \n"
L"    annot.context3D.runtime.setView(current_view_index);\n"
L"  }                                                     \n"
L"}                                                       \n";

pDoc->addJavaScript(L"scrollViewFuncJS", scrollViewFuncJS);

OdButtonPtr pPrevButton = OdButton::createObject();
OdString prev_button_name = L"previous";
pPrevButton->setName(prev_button_name);
pPrevButton->setLabel(prev_button_name);
pPage->addButton(pPrevButton, OdRect(5, 50, 425, 475));
pPage->addJavaScriptActionByField(prev_button_name, L"ScrollToView( this.pageNum, 1, false);", Action::kButtonReleased);

OdButtonPtr pNextButton = OdButton::createObject();
OdString next_button_name = L"next";
pNextButton->setName(next_button_name);
pNextButton->setLabel(next_button_name);
pPage->addButton(pNextButton, OdRect(540, 590, 425, 475));
pPage->addJavaScriptActionByField(next_button_name, L"ScrollToView( this.pageNum, 1, true);", Action::kButtonReleased);
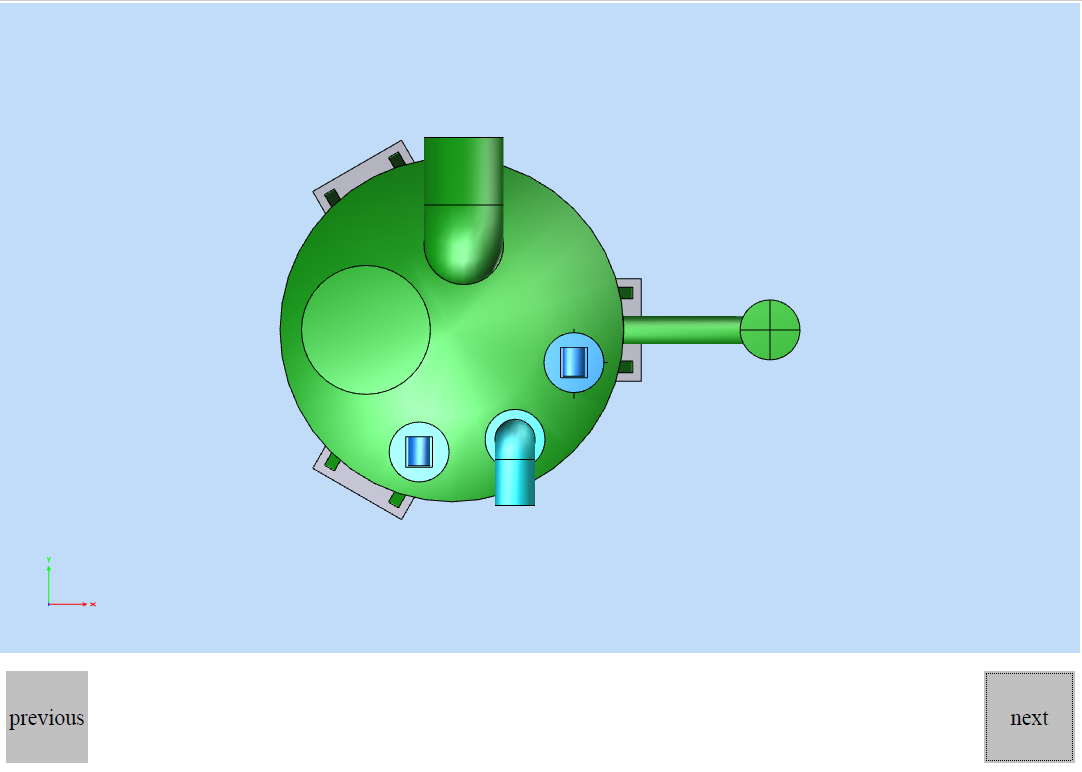
このコードでは、前へ、次への2つのボタンが作成されます。これらのボタンは、定義済みビューをそのインデックスに従って前または次に切り替えます。現在のビューインデックスを保存するには、グローバルドキュメントレベル変数current_view_indexを使用します。切り替えスクリプトも別の関数でレンダリングされます。このコードの結果を以下に示します。