[ブログに戻る](/ja/blog) # ファセットモデラーを使用したボディの作成
Taras Khalimanenko 3月 14, 2019 [\#b-rep](/ja/blog/tag/b-rep) [\#Example](/ja/blog/tag/example) [\#facet modeler](/ja/blog/tag/facet-modeler) [\#getting started](/ja/blog/tag/getting-started)
ODAのファセットモデラーは、ソリッドモデリングに境界表現(B-Rep手法とも呼ばれる)を使用します。B-Repは、ボディの境界を接続された面のセットとして記述する3次元ボディの表現であり、各面は表面上の輪郭です。
プリミティブオブジェクトとそれらを結合するための論理演算のみが使用される構成的ソリッドジオメトリ(CSG)の表現と比較して、境界表現はより柔軟で、はるかに豊富な操作セットを持っています。B-Repを持つシステムの相対的な利点は、境界表現を対応するフレームモデルに変換する際の比較的単純さ、およびその逆も同様です。この単純さの理由は、境界の記述がフレームモデルの記述と類似しているため、モデルをある形式から別の形式に変換することが容易になり、B-Rep表現のシステムが既存のシステムと互換性を持つようになるという事実にあります。
ファセットモデラーでB-Repを作成するにはいくつかの方法があります。
1\. プリミティブボディの作成:
FacetModeler::Bodyクラスのインターフェースには、プリミティブ形状を作成できるメソッドがあります。
| static Body box( const OdGePoint3d& ptOrigin,
const OdGeVector3d& vSizes ); |
| :--- |
| static Body pyramid( const Profile2D& rBase,
const OdGePoint3d& ptApex,
const DeviationParams& devDeviation = FMGeGbl::gDefDev ); |
| static Body extrusion( const Profile2D& rBase,
const OdGeVector3d& vDir,
const DeviationParams& devDeviation = FMGeGbl::gDefDev ); |
| static Body extrusion(const Profile2D& rBase,
const OdGeMatrix3d& mBasePlane,
const OdGeVector3d& vDir,
const DeviationParams& devDeviation = FMGeGbl::gDefDev); |
| static Body revolution( const Profile2D& rBase,
double dRadius, double dHeight,
const DeviationParams& devDeviation = FMGeGbl::gDefDev ); |
| static Body revolution(
const Profile2D& base,
const OdGeCircArc3d& revolutionAxisAndAngles,
const DeviationParams& deviation = FMGeGbl::gDefDev,
const OdGeMatrix2d\* pBaseTransform = 0 ); |
ファセットモデラーで球体を作成する例:
```
/*
DeviationParams DeviationParams( // structure that stores faceting parameters
double deviation, // deviation
OdUInt16 maxpercircle, // maximum facets per full circle
OdUInt16 minpercircle // minimum facets per full circle
);
*/
Body createSphere(const DeviationParams& devDeviation, double radius)
{
// Profile2D is a class that represents a set of contours on a plane.
Profile2D cSphereProfile; // Create sphere profile
cSphereProfile.resize(1); // With one contour
cSphereProfile.front().appendVertex(OdGePoint2d::kOrigin); // Add first point
cSphereProfile.front().appendVertex(OdGePoint2d::kOrigin + OdGeVector2d::kXAxis * radius * 2, 1); // Add vertex with bulge == 1 (Arc)
cSphereProfile.front().setClosed(); // Close profile
cSphereProfile.front().makeCCW(); // Make contour outer
// Create revolution body
return Body::revolution(cSphereProfile, radius, radius * 2, devDeviation);
}
```
2\. 与えられたメッシュに基づいてボディを作成することも可能です。
```
static Body createFromMesh(
const std::vector & aVertices,
const std::vector & aFaceData,
const std::vector * aFaceFlags = 0,
const std::vector * aEdgeFlags = 0,
const std::vector * aVertexFlags = 0,
const std::vector * pFaceColors = 0,
const std::vector * pEdgeColors = 0
);
```
主なパラメータは、頂点配列 (aVertices) と、これらの頂点がどのように面を形成するかを定義する配列 (aFaceData) です。また、フラグ (aFaceFlags, aEdgeFlags, aVertexFlags) や色 (pFaceColors, pEdgeColors) など、オブジェクトの追加プロパティを設定することもできます。このメソッドの使用例を以下に示します。
```
Body createMeshCube(const DeviationParams& devDeviation)
{
// Create array of vertices
std::vector aVertices = {
OdGePoint3d(0.0, 0.0, 0.0), OdGePoint3d(1.0, 0.0, 0.0),
OdGePoint3d(1.0, 1.0, 0.0), OdGePoint3d(0.0, 1.0, 0.0),
OdGePoint3d(0.0, 0.0, 2.0), OdGePoint3d(1.0, 0.0, 2.0),
OdGePoint3d(1.0, 1.0, 2.0), OdGePoint3d(0.0, 1.0, 2.0)
};
// Create array with face data
// The first number determines how many vertices are in the face.
// Further ones determine the vertex indices from aVertices.
std::vector aFaceData = {
4, 3, 2, 1, 0,
4, 4, 5, 6, 7,
4, 2, 3, 7, 6,
4, 1, 2, 6, 5,
4, 0, 1, 5, 4,
4, 3, 0, 4, 7
};
Body body = Body::createFromMesh(
aVertices, aFaceData
);
return body;
}
```
3\. 他のボディに対するブール演算を使用してボディを作成できます。
```
static Body boolOper( BooleanOperation eOperation,
Body& rOperandA, Body& rOperandB );
```
サポートされている操作: 和、積、差、XOR。
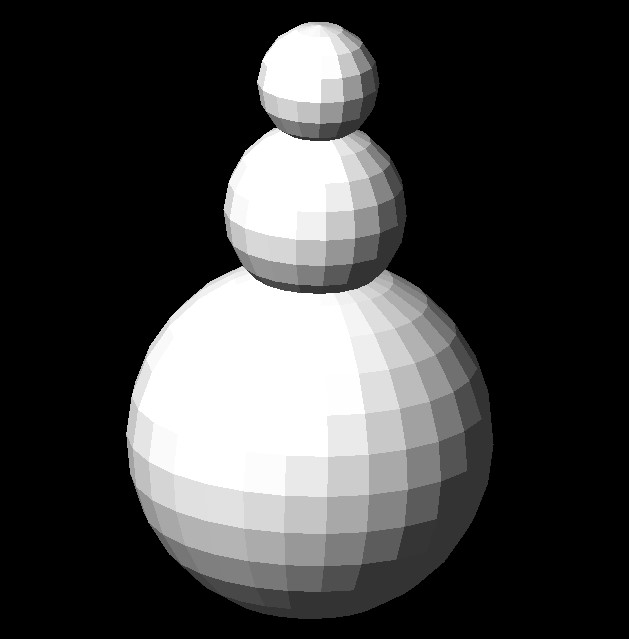
次の例では、オペランドを作成するために、以前に説明したcreateSphere関数を使用しています。
```
Body createSnowman(const DeviationParams& devDeviation, double radius = 100.0, double pressing = 0.1)
{
// Snowman consists of 3 connected spheres
Body upper = createSphere(devDeviation, radius / 3);
Body middle = createSphere(devDeviation, radius / 2);
Body lower = createSphere(devDeviation, radius);
OdGeVector3d vToUp(0.0, 0.0, radius * (1 - pressing));
middle.transform(OdGeMatrix3d::translation(vToUp * 2)); // Move middle sphere up
upper.transform(OdGeMatrix3d::translation(vToUp * 3)); // Move upper sphere up
Body snowman = Body::boolOper(eUnion, upper, middle); // Merge 2 spheres
// Merge previous result with last sphere
return Body::boolOper(eUnion, snowman, lower);
}
```
この例の結果を以下に示します。
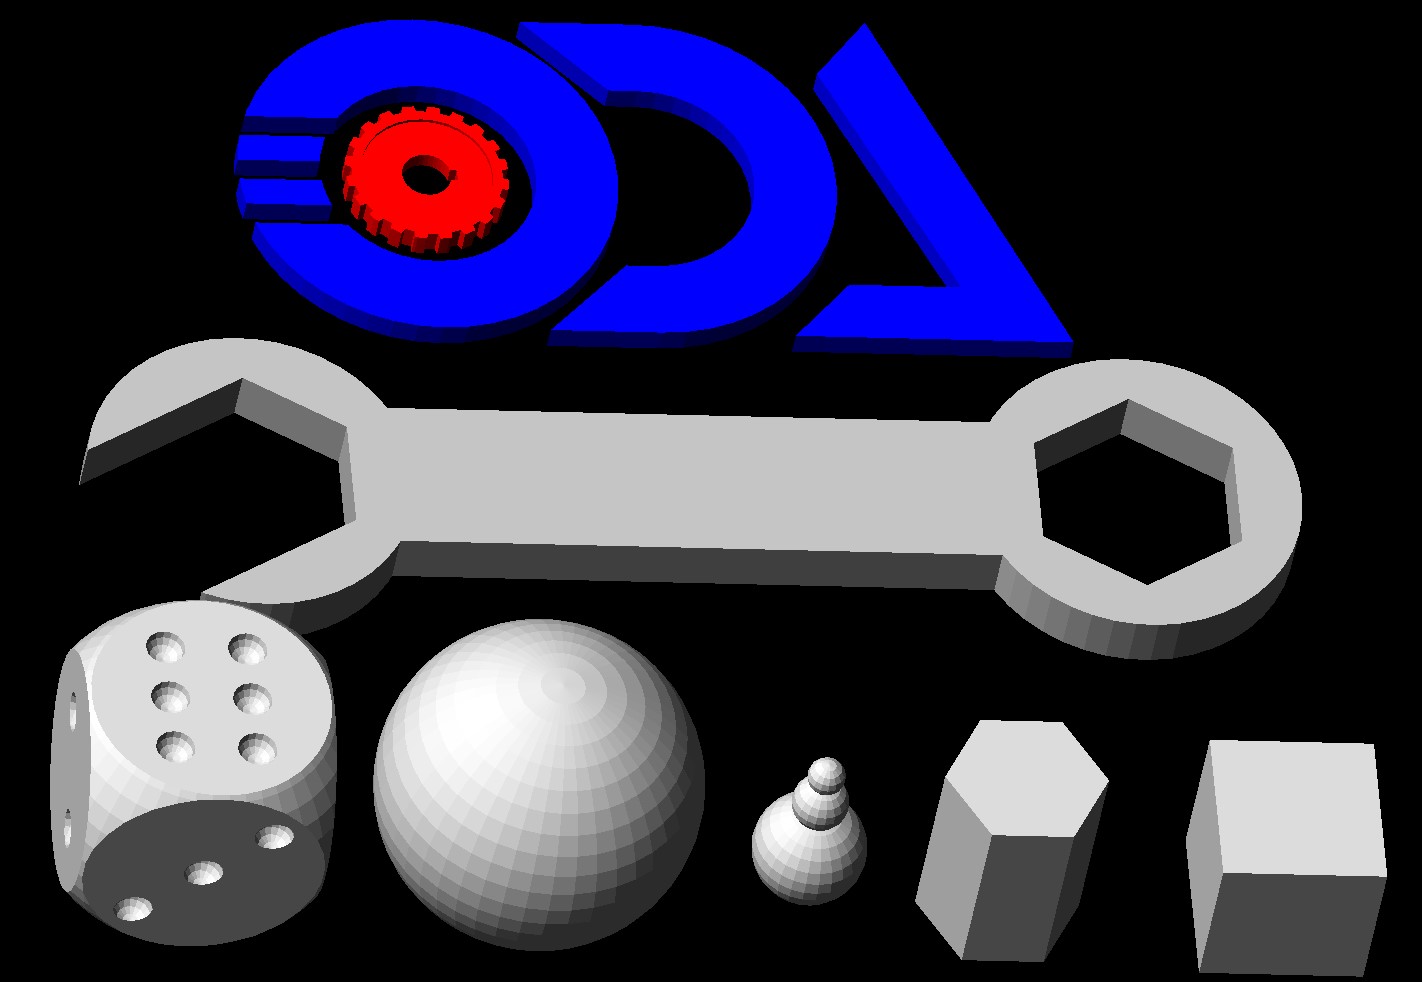
ブール演算を使用すると、さまざまなB-Repを作成できます(下図参照)。ブール演算の使用例は、FacetModeler/examples/FMCreateフォルダーにあります。
結果として得られる FacetModeler::Body からデータを取得する方法については、ODA ブログの「[ファセットモデラーで B-Rep データボディにアクセスする](https://www.opendesign.com/blog/2017/june/accessing-b-rep-data-bodies-facet-modeler)」を参照してください。
## 今すぐ始める
**ODAソフトウェアを60日間無料でお試しください。
リスクなし、クレジットカード不要。**
[無料で試す](https://www.opendesign.com/ja/free-trial)