[ブログに戻る](/ja/blog) # ODA Visualizeにおける衝突検出(3部作のパート2)
Egor Slupko 11月 15, 2018 [\#Visualize](/ja/blog/tag/visualize) [\#getting started](/ja/blog/tag/getting-started)
この記事は、ODA Visualizeにおける衝突検出メカニズムに関する一連の記事の一部です。前回の記事については、[パート1](https://www.opendesign.com/blog/2018/october/collision-detection-oda-visualize-part-1-3)をご覧ください。
#### OdGsView::collideを試す
ODA Drawings Debugアプリケーションには、衝突検出を使用する2つのコマンド「CollideAll」と「Collide」が含まれています。これらの実装は、TD\_DrawingsExamplesCommonプロジェクトのOdExCollideAllCmdクラスとOdExCollideCmdクラスで見つけることができます。
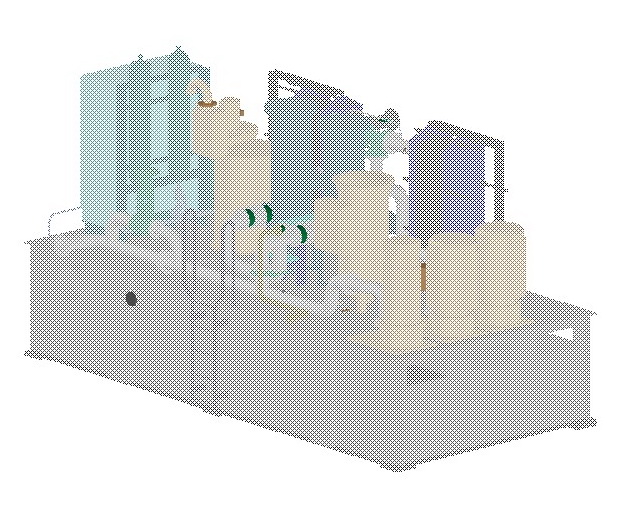
CollideAllコマンドはOdExCollideAllCmdクラスに実装されています。このコマンドは、ビュー内のすべての描画可能オブジェクト間の衝突を検出します。
まず、OdArrayにパスをコピーするOdGsCollisionDetectionReactorの継承を実装します。
```
class OdExCollisionDetectionReactor : public OdGsCollisionDetectionReactor
{
OdArray< OdExCollideGsPath* > m_pathes;
public:
OdExCollisionDetectionReactor()
{
};
~OdExCollisionDetectionReactor()
{
}
virtual OdUInt32 collisionDetected(const OdGiPathNode* pPathNode1, const OdGiPathNode* pPathNode2 )
{
OdExCollideGsPath* p1 = fromGiPath( pPathNode1 );
OdExCollideGsPath* p2 = fromGiPath( pPathNode2 );
m_pathes.push_back( p1 );
m_pathes.push_back( p2 );
return OdUInt32(OdGsCollisionDetectionReactor::kContinue);
}
OdArray< OdExCollideGsPath* >& pathes() {return m_pathes; }
};
```
ユーザー入力に応じて、交差のみを検出するか、交差と接触の両方を検出するようにOdGsCollisionDetectionContextを設定します。
```
int nChoise = pIO->getInt( OD_T("Input 1 to detect only intersections, any other to detect all"), 0, 0 );
OdGsCollisionDetectionContext cdCtx;
cdCtx.setIntersectionOnly( nChoise == 1 );
```
次に、衝突検出メソッドを呼び出し、リアクターから検出されたパスを収集します。
```
pView->collide( NULL, 0, &reactor, NULL, 0, &cdCtx );
OdArray< OdExCollideGsPath* >& pathes = reactor.pathes();
```
次に、すべてのパスをハイライト表示し、ユーザー入力後にそれらのハイライトを解除します。
```
for( OdUInt32 i = 0; i < pathes.size(); ++i )
{
const OdGiPathNode* p = &(pathes[i]->operator const OdGiPathNode &());
pModel->highlight( *p );
}
pIO->getInt( OD_T("Specify any number to exit"), 0, 0 );
for( OdUInt32 i = 0; i < pathes.size(); ++i )
{
const OdGiPathNode* p = &(pathes[i]->operator const OdGiPathNode &());
pModel->highlight( *p, false );
delete pathes[i];
}
pathes.clear();
```
このコマンドを実行した結果:
CollideコマンドはOdExCollideCmdクラスに実装されています。このコマンドは、選択された描画可能オブジェクトとビュー内の他のすべての描画可能オブジェクト間の衝突を検出します。
OdGsCollisionDetectionReactorの実装は、最初のノードが入力ノードの1つであるため、2番目のOdGiPathNodeのみをコピーします。
```
class OdExCollisionDetectionReactor : public OdGsCollisionDetectionReactor
{
OdArray< OdExCollideGsPath* > m_pathes;
public:
OdExCollisionDetectionReactor()
{
};
~OdExCollisionDetectionReactor()
{
}
virtual OdUInt32 collisionDetected(const OdGiPathNode* /*pPathNode1*/, const OdGiPathNode* pPathNode2 )
{
OdExCollideGsPath* p = fromGiPath( pPathNode2 );
if( p || pPathNode2->persistentDrawableId() )
{
m_pathes.push_back(p);
}
return OdUInt32(OdGsCollisionDetectionReactor::kContinue);
}
OdArray< OdExCollideGsPath* >& pathes() { return m_pathes; }
};
```
コマンドが実行されると、ユーザーにいくつかのオブジェクト(またはすでに選択されているオブジェクト)を入力として選択するように求め、独自のトラッカーのインスタンスを作成し、トラッカーを使用してpIO->getPointメソッドを実行します。
```
OdDbSelectionSetPtr pSSet = pIO->select(L"Collide: Select objects to be checked:",
OdEd::kSelAllowObjects |
OdEd::kSelAllowSubents |
OdEd::kSelLeaveHighlighted);
if (!pSSet->numEntities()) throw OdEdCancel();
OdExTransactionSaver saver( pDb );
saver.startTransaction();
OdGePoint3d ptBase = pIO->getPoint(L"Collide: Specify base point:");
CollideMoveTracker tracker( ptBase, pSSet, pDb, pView );
OdGePoint3d ptOffset = pIO->getPoint(L"Collide: Specify second point:", OdEd::kGdsFromLastPoint | OdEd::kGptRubberBand, 0, OdString::kEmpty, &tracker);
```
このトラッカーは、選択されたオブジェクトの OdGiPathNode 表現を作成し、各マウス移動イベントに対して、それを OdGsView::collide メソッドの入力リストとして使用します。
```
OdExCollisionDetectionReactor reactor;
m_pView->collide( inputArray.asArrayPtr(), inputArray.size(), &reactor, NULL, 0 );
highlight( reactor.pathes() );
```
OdGsView::collide メソッドの後、既にハイライトされているオブジェクトのハイライトを解除し、新しく検出された衝突をハイライトします。
```
void CollideMoveTracker::highlight( OdArray< OdExCollideGsPath* >& newPathes )
{
//1) Unhighlight old paths
if( !m_prevHLPathes.empty() )
{
for( OdUInt32 i = 0; i < m_prevHLPathes.size(); ++i )
{
m_pModel->highlight( m_prevHLPathes[i]->operator const OdGiPathNode &(), false );
delete m_prevHLPathes[i];
}
m_prevHLPathes.clear();
}
//2) Highlight new paths
for( OdUInt32 i = 0; i < newPathes.size(); ++i )
{
m_pModel->highlight( newPathes[i]->operator const OdGiPathNode &(), true );
m_prevHLPathes.push_back( newPathes[i] );
}
}
```
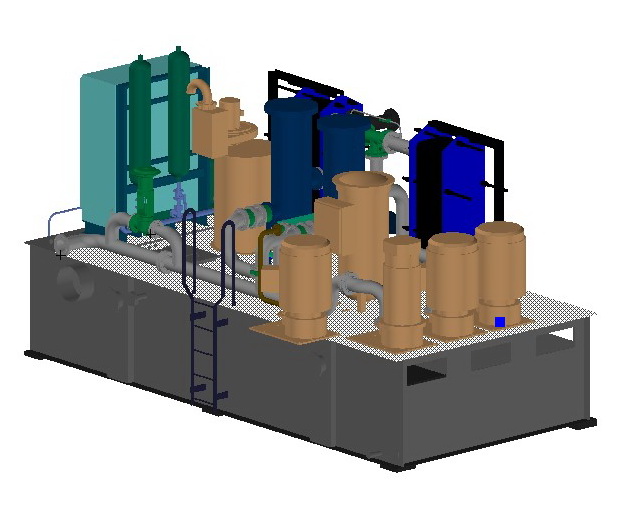
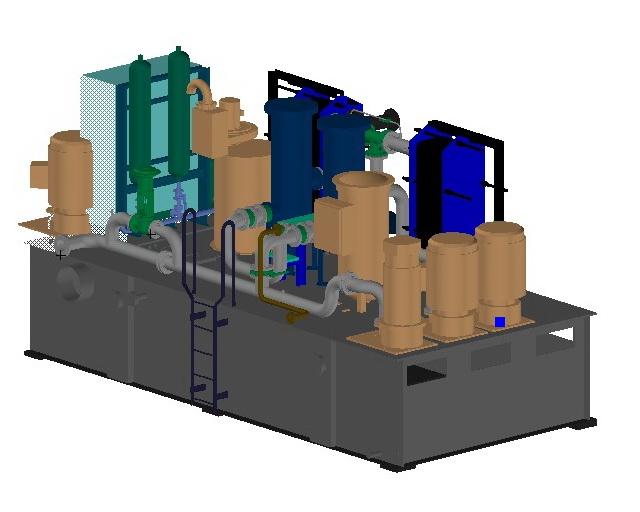
このコマンドを使用すると、エンティティを移動し、それらが互いに衝突しているかどうかを確認できます。
このシリーズの次の記事では、OdGiCollideProc と OdGiCollisionDetector について説明します。
## 今すぐ始める
**ODAソフトウェアを60日間無料でお試しください。
リスクなし、クレジットカード不要。**
[無料で試す](https://www.opendesign.com/ja/free-trial)