[Back to Blog](/blog) # Using a “Fence” or Planar Element to Clip a .dgn Drawing for PDF Export
Sergey Sorvenkov February 06, 2018 [\#dgn](/blog/tag/dgn) [\#export](/blog/tag/export) [\#pdf](/blog/tag/pdf)
Meeting the ODA member requests, the ability to clip a .dgn drawing during export to a .pdf file was made available.
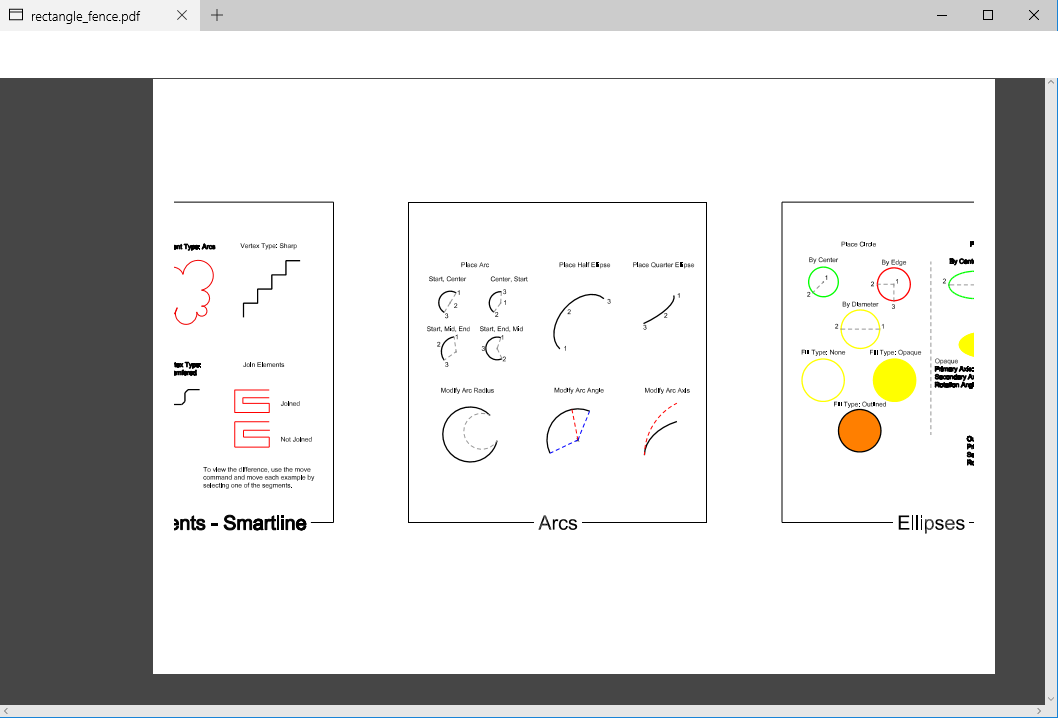
Before you export a .dgn file to a .pdf file, set a clipping area, and the resulting .pdf file will include only those elements (or parts of elements if the trimming border passes through it) that are inside the clipping area. A clipping area can have a free shape, but a closed planar element such as a shape, circle, ellipse, or complex shape should be used to specify the boundaries of a clipping area.
So. Let's use the OdaDgnApp example application to examine step-by-step how to execute a “fence” clipping for exporting to a .pdf file.
Run the example application and open the .dgn file that you want to export to a .pdf file and render with one of the rendering devices provided with Teigha.
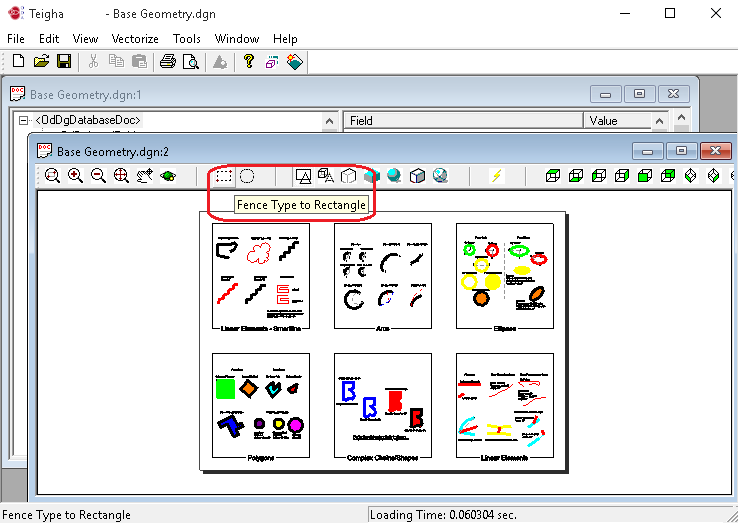
Choose either of the two icons in the toolbar for “fence” clipping to set a clipping shape.
The first case sets a rectangle clipping area (actually it will be a shape element). Click “Fence Type to Rectangle”:
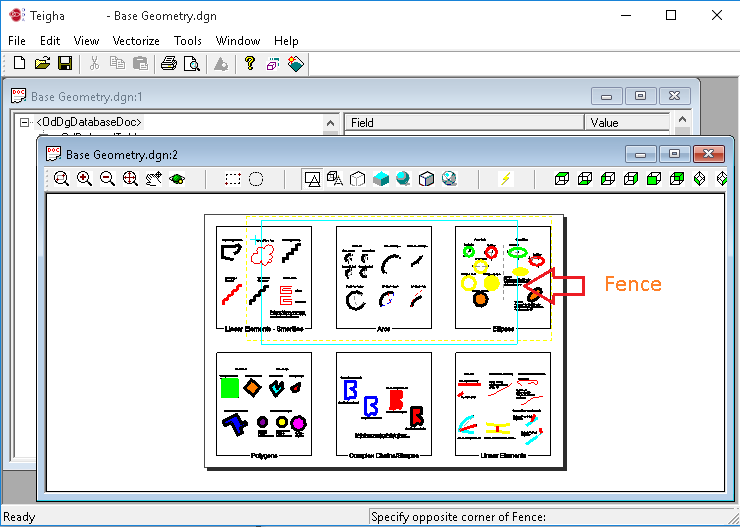
Next, specify the rectangle corners of the fence:
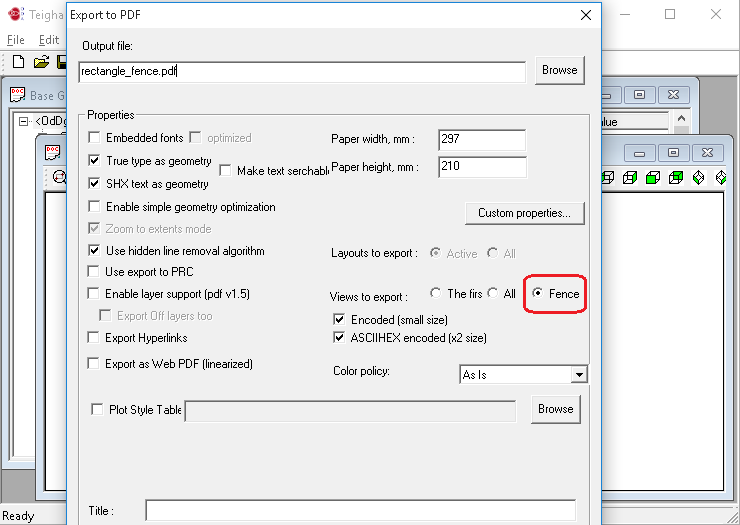
Next, choose File -> Export To PDF. And turn on the “Fence” option in the Export To PDF settings:
Run the export and get the result:
The same action can be done for the second case when setting a circle clipping area. Click “Fence Type to Circle”:
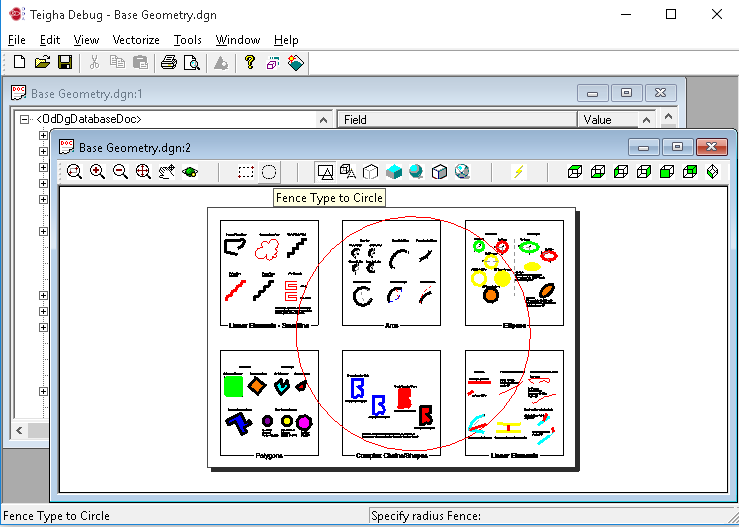The result is the following when exporting to a .pdf file:
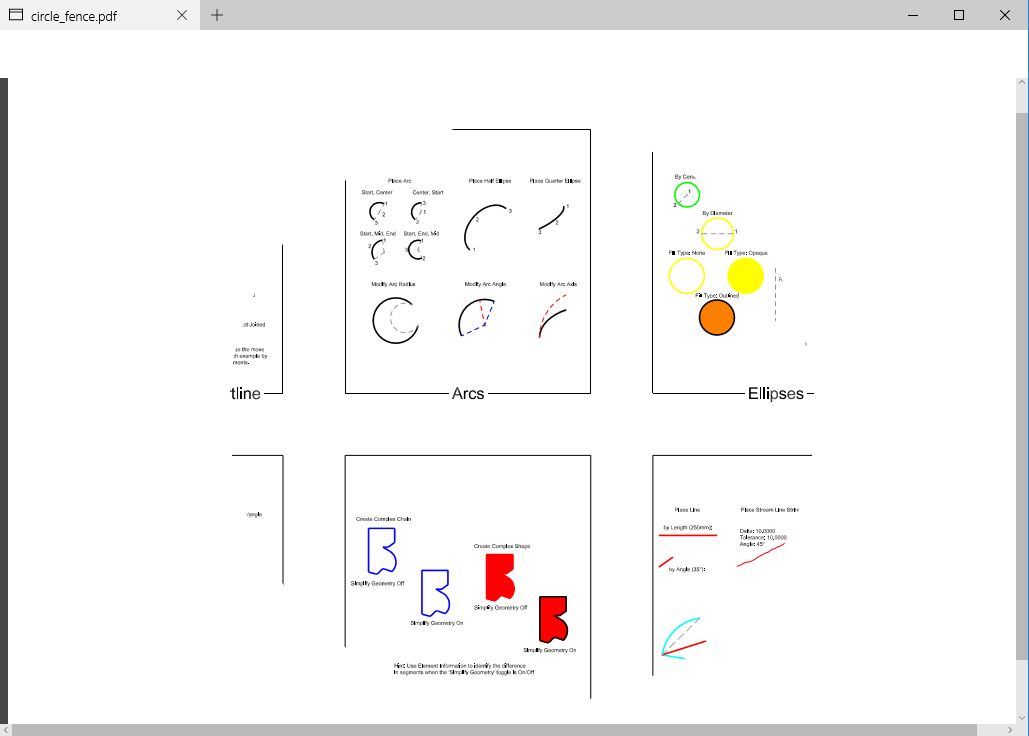Done!
Now let’s see more about the implementation in OdaDgnApp.
The “Fence” command with arguments is declared to implement this feature. It is a specific class inherited from the OdEdCommand class. See OdaDgnAppDoc.h:
```
class Cmd_Fence : public OdEdCommand
{
public:
const OdString groupName() const;
const OdString globalName() const;
void execute(OdEdCommandContext* pCmdCtx);
};
```
The command is added to the OdEdCommandStack list.
See OdaDgnAppVectorizer.cpp for the binding UI with a command execution:
```
ON_COMMAND(ID_CREATEFENCE_BTN, OnCreateFence)
ON_COMMAND(ID_CREATEFENCE_CIRCLE, OnCreateFenceCircle)
. . . . .
void COdaDgnAppVectorizer::OnCreateFence()
{
GetDocument()->ExecuteCommand( OD_T("Fence r") );
}
void COdaDgnAppVectorizer::OnCreateFenceCircle()
{
GetDocument()->ExecuteCommand( OD_T("Fence c") );
}
```
Then go to OdaDgnAppDoc.cpp where the command is processed:
```
void COdaDgnAppDoc::ExecuteCommand(const OdString& sCmd, bool bEcho)
{
. . . . .
pCommands->executeCommand(s, pCmdCtx);
if( s == OD_T("FENCE") )
{
OdValuePtr pHandle = pCmdCtx->arbitraryData(OD_T("Fence"));
if( !m_idFence.isNull() && !pHandle.isNull() )
{
OdDgElementPtr pFence = m_idFence.openObject(OdDg::kForWrite);
if( !pFence.isNull() )
{
pFence->erase(true);
}
}
if( !pHandle.isNull() )
{
OdInt64 uHandle = 0;
pHandle->get(uHandle);
m_idFence = m_pDb->getElementId( OdDbHandle((OdUInt64)uHandle));
}
}
. . . . .
}
```
After the command is successfully executed, a specific element for clipping is assigned. Its m\_idFence is set, and then .pdf export will use it for clipping. The executeCommand() itself should call proper execution for the fence command. As a result, Cmd\_Fence::execute() should be run. Inside this call a clipping area specification should be done:
```
void Cmd_Fence::execute(OdEdCommandContext* pCmdCtx)
{
. . . . .
try
{
pt1 = pIO->getPoint(L"Specify corner of window, enter a scale factor (nX or nXP), or\n"
L"[Rectangle/Circle] :",
OdEd::kInpThrowEmpty|OdEd::kInpThrowOther|OdEd::kGptNoOSnap, 0, szKeywords);
pt1 = pIO->getPoint(OD_T("Specify corner of Fence:"),OdEd::kInpThrowEmpty | OdEd::kGptNoOSnap);
pt2 = pIO->getPoint(OD_T("Specify opposite corner of Fence:"), OdEd::kGptNoUCS | OdEd::kGptRectFrame | OdEd::kGptNoOSnap);
create_Fence(pt1, pt2, pView, pDgView->getModelId(), pCmdCtx, false );
}
. . . . .
catch(const OdEdKeyword& kw)
{
switch(kw.keywordIndex())
{
case 0: // Rectangle clipping area
pt1 = pIO->getPoint(OD_T("Specify corner of Fence:"),OdEd::kInpThrowEmpty | OdEd::kGptNoOSnap);
pt2 = pIO->getPoint(OD_T("Specify opposite corner of Fence:"), OdEd::kGptNoUCS | OdEd::kGptRectFrame | OdEd::kGptNoOSnap);
create_Fence(pt1, pt2, pView, pDgView->getModelId(), pCmdCtx, false );
break;
case 1: // Circle clipping area
pt1 = pIO->getPoint(OD_T("Specify center of Fence:"),OdEd::kInpThrowEmpty | OdEd::kGptNoOSnap);
pt2 = pIO->getPoint(OD_T("Specify radius Fence:"), OdEd::kGptNoUCS | OdEd::kGptRectFrame | OdEd::kGptNoOSnap);
create_Fence(pt1, pt2, pView, pDgView->getModelId(), pCmdCtx, true );
break;
}
}
. . . . .
}
```
The create\_Fence() method creates a proper element for clipping according to the chosen fence command mode. It will be OdDgEllipse3d in the case of a circle clipping boundary and OdDgLineString3dPtr in the case of a rectangle one.
And finally to assign this element as a volume clipping element for exporting to .pdf, see ExportToPDFDialog.cpp:
```
OdUInt32 CExport2PDFDialog::ExportToPdf(OdString pdfFileName)
{
OdPdfExportModulePtr pModule = ::odrxDynamicLinker()->loadApp(OdPdfExportModuleName);
{
OdPdfExportPtr exporter = pModule->create();
{
PDFExportParams params;
. . . . .
// Use fence for pdf exporting to clip the drawing
if( m_Views == 2 && !m_idFence.isNull() )
{
idView = getActiveViewId(m_pDb); // Get active view.
. . . . .
if( !idView.isNull() )
{
. . . . .
pView->setVolumeClipElementId( m_idFence ); // Set fence as volume clip element
. . . . .
}
}
}
}
}
```
This allows you to set and implement your own clipping boundary to trim a DGN drawing for export to a .pdf file.
## Get started today
**Try ODA software free for 60 days.
No risk, no credit card required.**
[Try for Free](https://www.opendesign.com/free-trial)